
Localization in iOS and How to Make It Not Suck

Recently I had been reviewing my own notes on setting up localization in an iOS project in Xcode, and realized there were a few things I wasn’t 100% sure on. So I decided to do a little research and write this post for my own (and others) future reference on how to do this sometimes tedious task.
If you’ve ever worked on iOS projects with multiple language support, you’ve probably noticed that localization has never seemed to be a top priority for Xcode. Unlike Android Studio, where localization is practically mandatory — you get stern warnings from the IDE if you don’t put your strings in the right file — Xcode doesn’t even create the infrastructure for it by default, it must be done manually.
In this post, I’ll go over the steps to get started maintaining a localized project. I’ll also go over a great 3rd party tool I came across to automate the tedium of maintaining a localized project.
How Xcode Manages Localized Projects
Before you set up anything for localization, you should understand how a localized project works. Essentially, Xcode places anything that is language-dependent in specifically-named directories named after their respective language. So for for English specific files, you would have a directory called “/en.lproj”, for Japanese, it would be “/ja.lproj”, and so on.
As for the contents of these directories, storyboards/XIBs have their own localized strings files, called “<name>.strings”, and the non-Interface Builder strings are usually in a file called “Localizable.strings”. You can also create different XIBs/storyboards for different languages (some languages might call for a totally different layout). Also, different languages may have differing rules for plurality, which requires the a use of a specially formattted plist file.
“Base” Localization
There is also a concept called a “Base” localization. Xcode will by default add a directory called “/Base.lproj” to your project. The purpose of this directory is to hold the default layouts of your views (i.e. storyboards/XIBs) in your “development language”. This was originally created to alleviate the previous practice of creating separate XIBs for each language (!).
One thing about Base Localization that always seemed ambiguous to me was if I should put the my English (i.e. the development language) Localizable.strings file in the English directory (“en.lproj”), or the Base directory. After doing a little digging it seems that Localizable.strings should always go in the specified language directory (according to Apple’s docs here), NOT the Base directory.
Setting up a Localized Project
So having said that, if you look at the directory structure for a default project that has NOT been localized, you will notice the following:
-
Storyboards/XIBs have already been placed in the “Base.lproj” directory
-
No Localizable.strings have been created
The first thing you might want to do is create your initial Localizable.strings file. To do that, first create a new “strings” file in Xcode (New->File->Strings File).
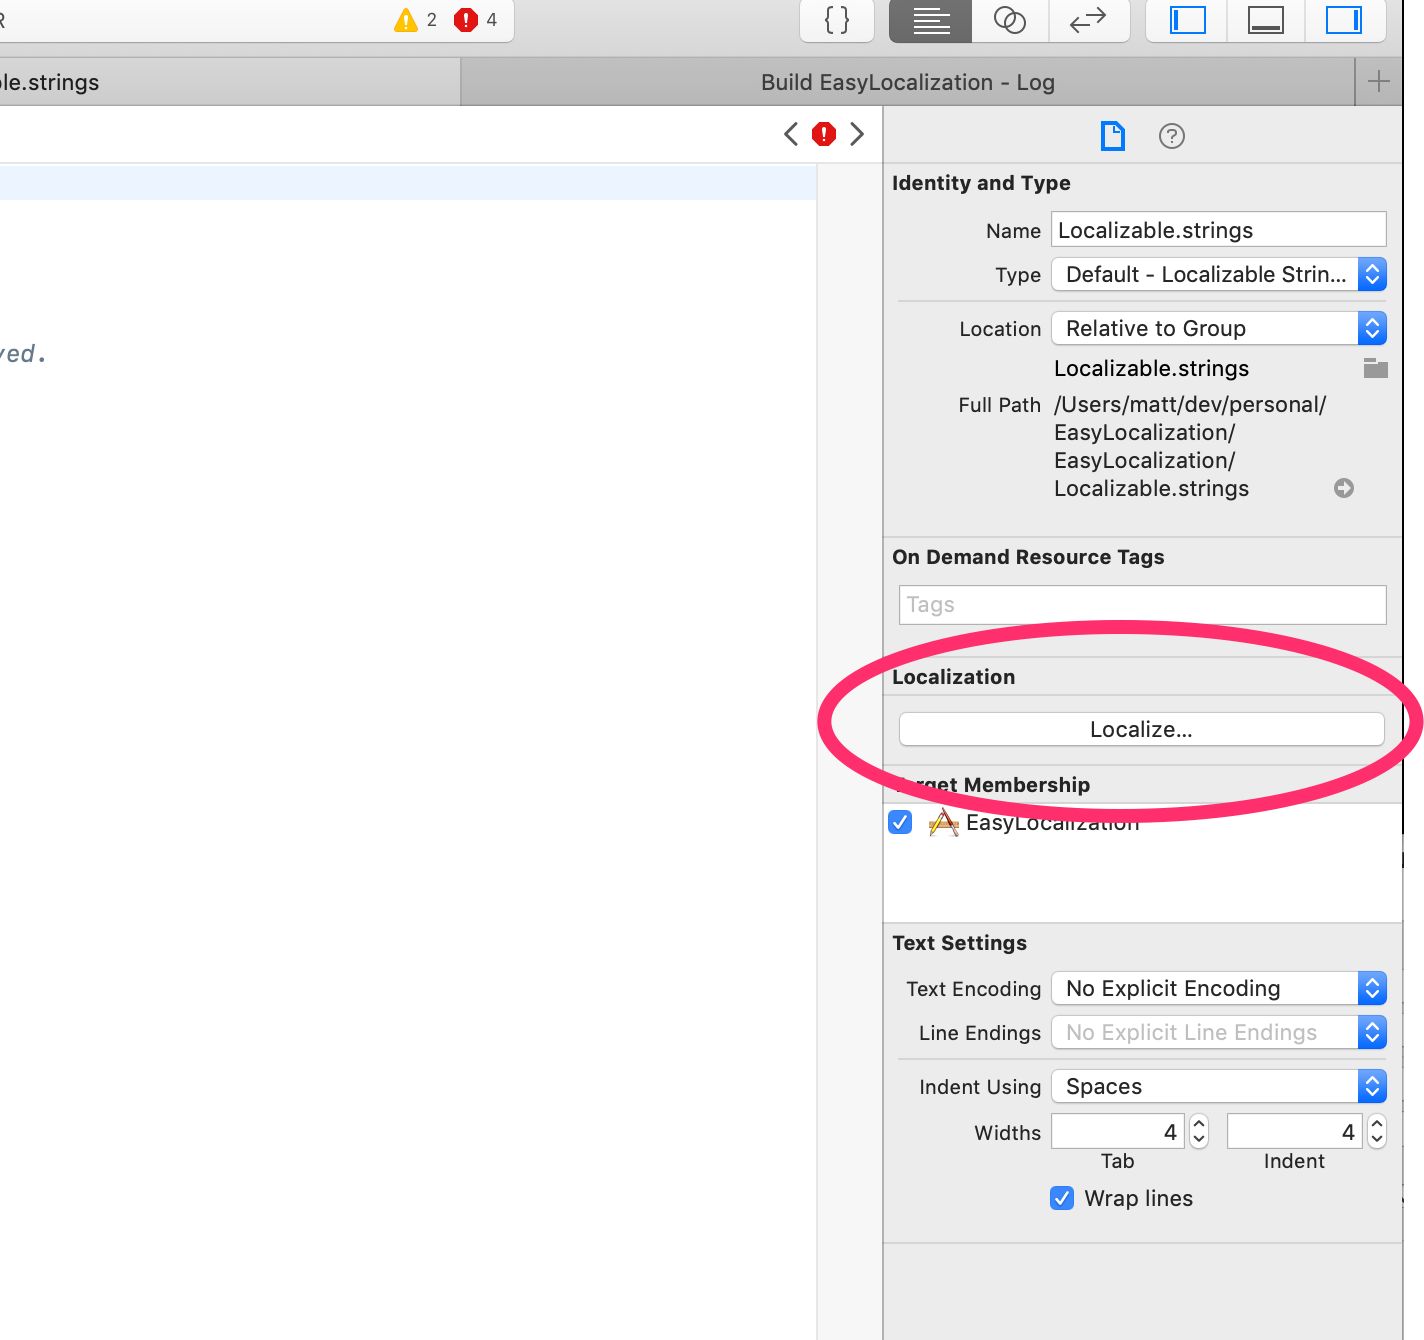
Once you’ve done that, Xcode STILL doesn’t know this is for localization. You can do this by clicking on the file, and clicking the “Localize…” button in the right pane. You’ll get a pop-up menu asking which language you want to put this file. Xcode will then place the file in the directory for your respective selection.
Now that you have that, you can add another language. To do so, do the following:
-
Click on the project in the project navigator
-
Click on the project (not the target)
-
Find the “Localizations” option and select the little plus sign
-
Choose the language you want to localize from the drop down
Handoff (And Hand-Back) to the Translator
Eventually you will have to export all your localization efforts so you can have someone do some translations. Xcode has a command to convert all your localized strings to a file format called XLIFF. XLIFF is an XML-based format targeted towards the localization industry.
In addition, (as of Xcode 10), Xcode will now also export storyboards and image assets into a folder called “sources”. The intention of this is give translators more context of where your strings are in the app. There’s also an auto-generated folder called “notes” where you can put in your own custom documentation of the strings’ context.
To export your strings, just tap on the project, and go to Editor -> “Export for Localization” and select the languages you want to export.
The translators are supposed to take your XLIFF files and edit them with the correct translations. Once you get the translated XLIFFs back, you can import them into your project by going to Editor -> “Import Localizations”.
Automatically Generating a Localized Strings File
If you want, you can run a tool called “extractLocStrings” (formerly known as “genstrings”) in your project. This will generate a Localizable.strings file (in your development language) with all the keys you used with the NSLocalizedString function. If you do run it, make sure to copy the generated file to where you originally put your first Localizable.strings file
Making Updates…the Annoying Way
So you’ve used extractLocStrings to generate a Localizable.strings file for your English strings. You used Xcode’s tooling to create template strings files for your translators, and got them translated. That all sounds well and good. But what will inevitably happen is you will need to add more strings. Or change existing strings. What do you do then?
You can continue to use extractLocStrings to generate new strings from your code. Though you should make sure you set a default value in all your NSLocalizedString functions, otherwise extractLocStrings will blow it away. If you don’t have defaults, you will have to do some diffing between your original file and the newly generated file.
Also, if you have to make updates to a storyboard’s strings, you’ll probably have to go into the file and make manual updates. You’ll have to cross-reference the UI widget’s Object ID in the storyboard and it add it appropriately. An example of one these files is below:
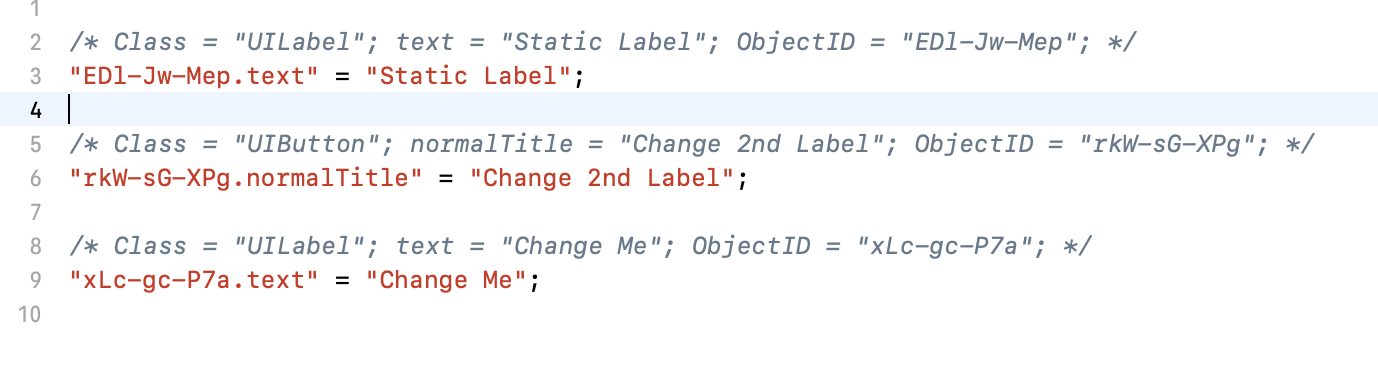
Also, don’t forget to remove entries that aren’t applicable anymore. Better make sure you remember their object ID before you hit “delete” in the storyboard, otherwise your .strings files will get messy fast!
But there must be a better way….
Making Updates….the Better Way
Luckily, a better way exists in 3rd party tooling! There is a great library called BartyCrouch that will help you automate the whole tedious process of adding/modifying localizable strings.
Basically, using BartyCrouch in your project will automatically add/change strings in your .strings files without wiping your already-translated values! This means the following things:
-
Adding a new string to your storyboard or code will append that string to all your strings files
-
Deleting a string from your storyboard or code will remove that string from the strings files
Install bartycrouch with the command:
brew install bartycrouch
Create the config file by running this command from the root of your project:
bartycrouch init
Then you can update all your projects Localizable assets with the command:
bartycrouch update
An even better idea would be to run the update command when you build your project. You can do this by adding a run script in the “Build Phases” tab in your Xcode project. The BartyCrouch docs suggest the following:
if which bartycrouch > /dev/null; then

  bartycrouch update -x

  bartycrouch lint -x

else

  echo "warning: BartyCrouch not installed, download it from [https://github.com/Flinesoft/BartyCrouch](https://github.com/Flinesoft/BartyCrouch)"

fi
Final Thoughts
One might argue that relying on a 3rd party tool for such a crucial part of your app might be risky. BartyCrouch is actively maintained right now (as of this writing), but what happens if that stops happening? You may not want to take that risk, especially if your project is small or doesn’t have that many localized assets.
However, I would highly suggest using BartyCrouch to eliminate the tedious and error-prone process of making updates to your localized assets. The automation this tool adds is very valuable.
Don’t forget to follow me on twitter!